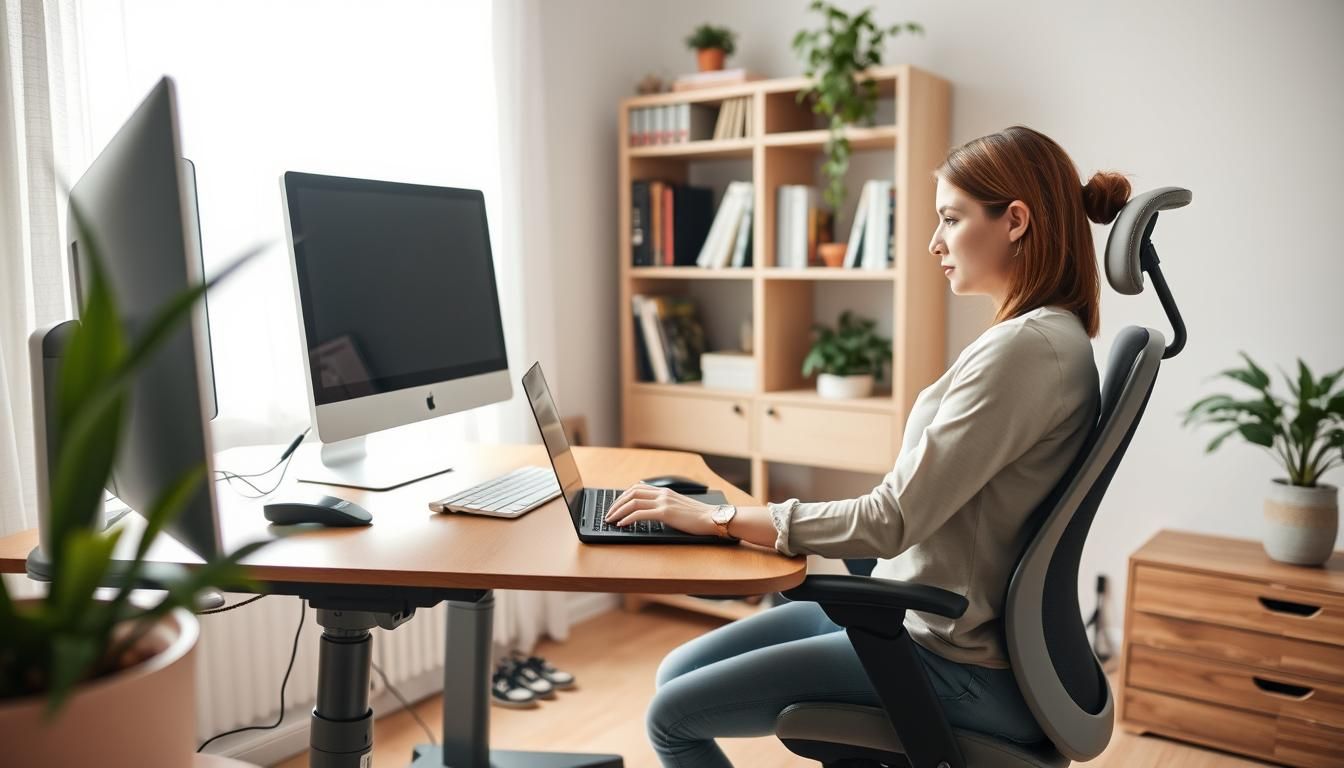
Nearly 80% of people who began working from home during the pandemic report new or worsened neck or back pain within the first year. That single figure shows how small setup choices can have big consequences for comfort and health.
This beginner guide ergonomics piece walks you through simple, evidence-based home office ergonomics tips so you can work with less pain and more focus. Start with the chair and screen, tune desk and keyboard height, and add low-cost fixes like a lumbar pillow or monitor stand to see quick gains.
Use these ergonomics for beginners suggestions to test changes in short bursts—30 minutes is enough to tell if a tweak helps. Over weeks and months, small improvements add up to better posture, fewer aches, and higher productivity.
Key Takeaways
- Begin with a supportive chair and correct monitor height to reduce neck and back strain.
- Adjust chair height so feet rest flat or use a footrest; elbows should sit near a 90–110° angle.
- Simple tools—laptop stands, external keyboards, lumbar cushions—offer big ergonomic returns for little cost.
- Test changes for short periods and fine-tune: comfort after 30 minutes is a good indicator.
- Combine ergonomic setup with movement habits (micro-breaks and sit-stand routines) for lasting benefits.
Why home office ergonomics matter for comfort and productivity
Working from home can feel comfortable at first. Small aches build up when your chair, screen, and keyboard are not aligned. This section explains health risks, how better setup lifts focus, and why tiny changes stack into big gains over time. It is a practical primer for anyone using home office ergonomics tips or reading a beginner guide ergonomics to get started.
Health risks of poor home workspace ergonomics
Poor posture and wrong screen height increase neck and back pain. Sore wrists and shoulder tension come from repetitive typing and awkward mouse use. Hard desk edges can press into forearms and cause contact stress.
Long periods of static sitting raise strain even when your chair is okay. Not moving enough amplifies risk for joints and muscles. Using a handset without a headset often leads to cradling the phone and neck strain.
Productivity and focus benefits from ergonomic improvements
Fixing a few things reduces fatigue and keeps mental energy steady. Correct chair support and the right monitor height help you work longer without discomfort. Clear desk areas and natural light support concentration and mood.
Switching to a headset, raising the screen, or adjusting keyboard angle cuts interruptions caused by pain. These are simple wins for ergonomics for beginners who want faster gains in daily focus.
How small changes add up over weeks and years
Experts recommend upgrading key items first: a supportive chair, proper desk height, and a comfortable keyboard and mouse. Repeated micro-stressors fade when those elements are fixed.
Small, low-cost fixes such as a lumbar pillow, laptop stand, or monitor repositioning show measurable drops in discomfort in a few weeks. Over months and years, those reductions lower the chance of chronic issues.
| Problem | Simple Fix | Expected Benefit |
|---|---|---|
| Neck pain from low screen | Raise monitor to eye level or use a laptop stand | Less neck strain, improved focus |
| Lower back soreness | Add lumbar support or adjust chair tilt | Better spinal alignment, reduced fatigue |
| Wrist discomfort | Use an ergonomic keyboard or change keyboard height | Lower wrist pressure, fewer interruptions |
| Shoulder tension from phone use | Switch to a headset or speaker | Frees neck, reduces muscle tightness |
| Stiffness from long sitting | Set hourly micro-breaks and brief stretches | Less cumulative strain, sustained productivity |
Working from home works best when your body feels supported. This beginner guide ergonomics section breaks down what matters and how to act. Small, targeted changes can cut pain and boost focus within days.
What “ergonomics” means for people working from home
Ergonomics means arranging your desk, chair, and tools to reduce stress on joints. For many remote workers that means paying attention to chair support, monitor height, keyboard and mouse placement, and clear under-desk leg space. Changing these items eases back, neck, and wrist strain while making long workdays more comfortable.
Core principles: neutral posture, support, reach, and movement
Neutral posture keeps the spine aligned with shoulders relaxed. Aim for feet flat, hips slightly higher than knees, and wrists straight while typing. This is the backbone of ergonomics for beginners.
Support means good lumbar contact, proper seat depth, and a stable base. A chair with adjustable lumbar or a simple lumbar pillow can help.
Reach organizes items so you avoid overstretching. Place the keyboard, mouse, and phone within easy reach of your dominant hand.
Movement breaks static load. Follow sit-stand changes, micro-breaks, and small stretches to reduce fatigue. The 20–8–2-style habit keeps muscles active and circulation steady.
How to prioritize fixes when you’re on a budget
Start with what hurts the most. If your lower back complains, invest in a better chair or add a lumbar cushion and seat pad. If your neck is stiff, raise the monitor or use a laptop stand with an external keyboard.
Low-cost items like external keyboards, mice, monitor risers made from books, and inexpensive footrests deliver big returns. Test each change for 30 minutes to judge comfort before buying more gear.
These steps form a practical path for ergonomics for beginners and improve home workspace ergonomics without overspending.
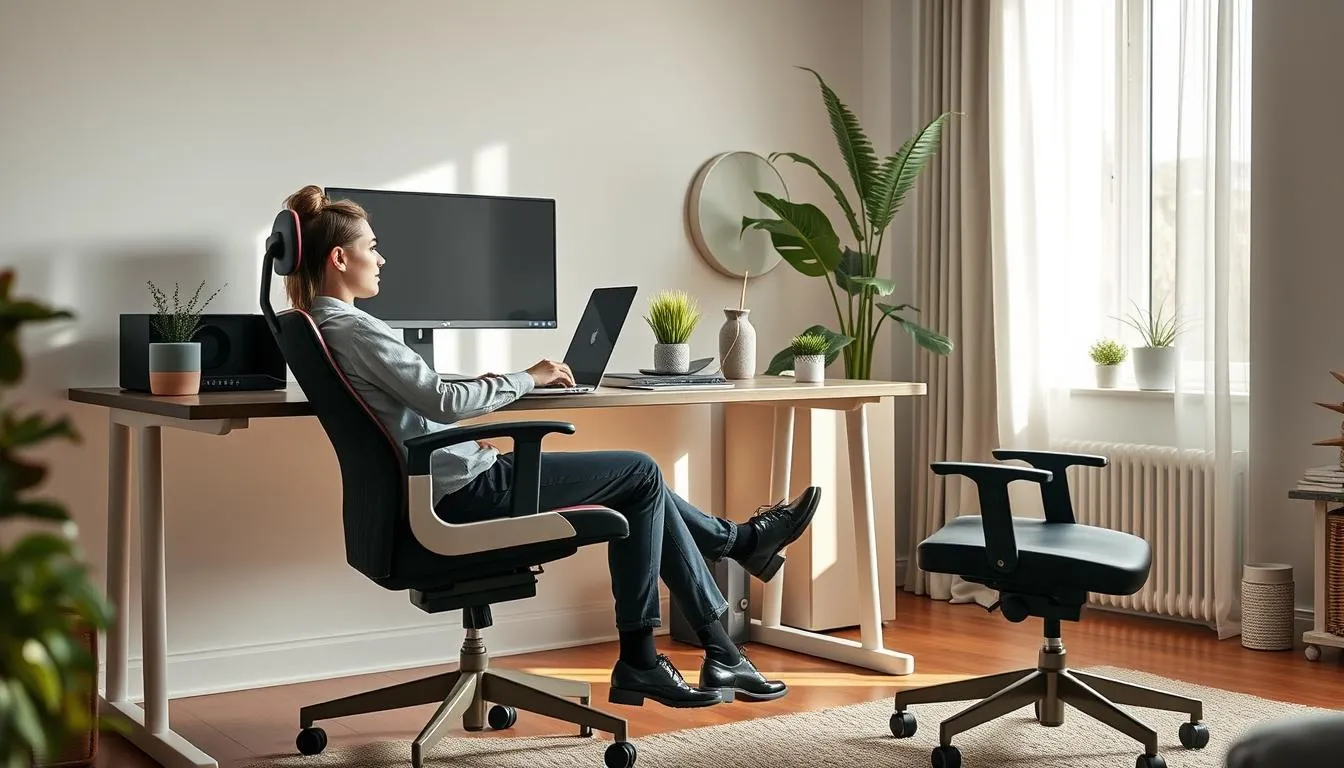
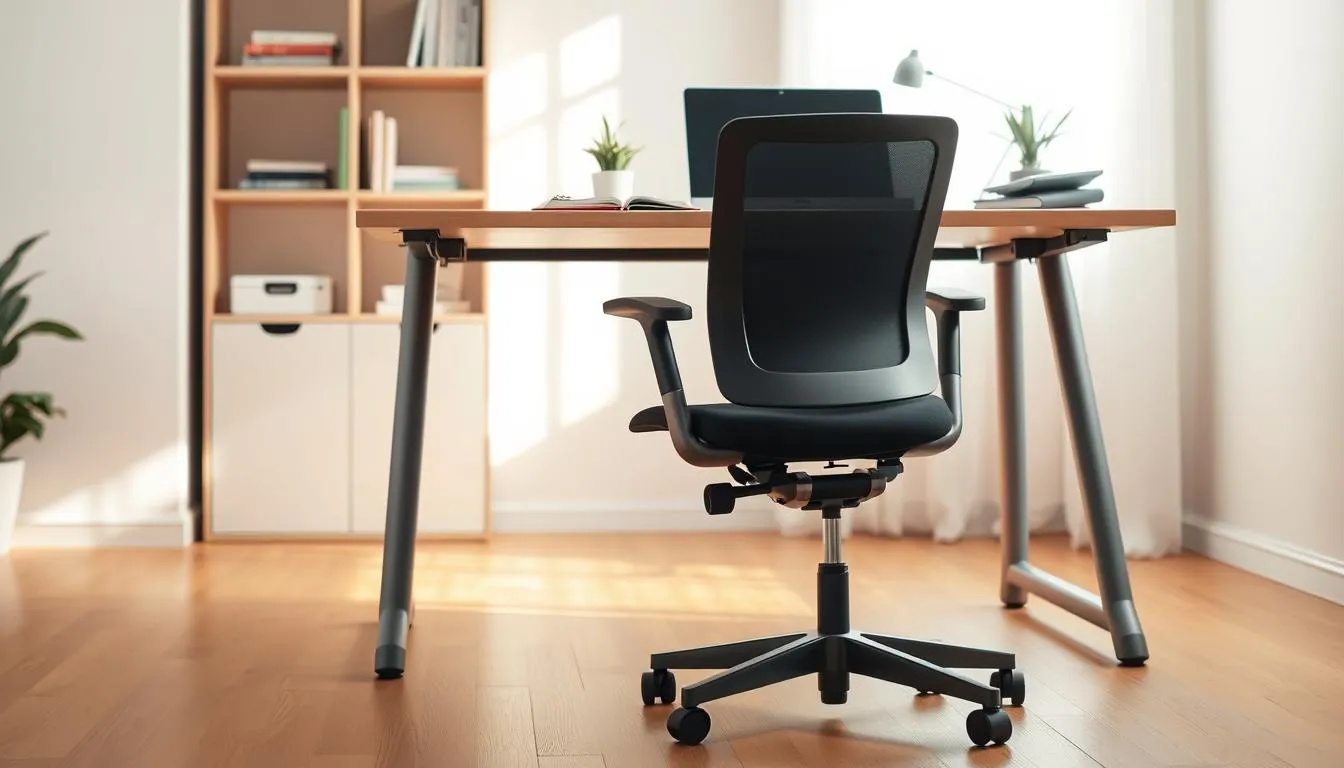
Choosing the right chair: spine support and adjustability
Picking a chair that supports the spine makes long workdays less tiring. Good chairs let your feet rest flat, keep thighs parallel to the floor, and allow elbows to stay close to the body so shoulders can relax. These home office ergonomics tips help prevent slouching and reduce pressure on the lower back.
Why lumbar support and seat depth matter
Built-in or adjustable lumbar padding keeps the lower spine’s natural curve. When lumbar support is missing, people tend to lean forward, increasing spinal load. Seat depth matters because too-deep cushions push users forward; too-shallow seats fail to support the thighs. Aim for about two to four fingers’ space between the seat edge and the back of the knees.
Key chair features to look for: height, armrests, recline
Seat height should let feet sit flat on the floor. Use a footrest if needed. Armrests that move up and down and in and out help keep elbows near the body and cut shoulder strain. Look for a synched tilt or recline that lets the seat and back move together to reduce spinal compression.
Certified designs meeting BIFMA or EN 1335 standards offer reliable support. High-adjustability models such as Steelcase Gesture demonstrate how adaptable lumbar support and multi-axis armrests improve posture for many body types.
Budget alternatives: lumbar pillows and seat cushions
If buying a new chair is not feasible, retrofit an existing seat with a lumbar-support pillow and a breathable seat cushion. These add-ons encourage sitting back into the chair rather than leaning forward and can be a low-cost step recommended in this beginner guide ergonomics approach.
For a compact comparison of key features and budget options, consider this quick guide from a practical review choosing the right ergonomic office chair. The review highlights adjustable lumbar support, seat depth, recline, and 3D/4D armrests as priorities when shopping.
| Feature | Why it matters | Budget fix |
|---|---|---|
| Lumbar support | Maintains natural lower back curve and prevents forward lean | Memory foam lumbar pillow |
| Seat depth | Ensures thigh support and proper knee clearance | Thin seat wedge or cushion to adjust depth |
| Seat height | Keeps feet flat and thighs parallel to the floor | Adjustable footrest for shorter users |
| Armrests | Supports elbows near the body, reduces shoulder strain | Armrest pads or detachable arm supports |
| Recline/t ilt | Reduces spinal compression during relaxed postures | Back cushion to improve comfort when reclined |
| Materials | Breathable mesh and supportive foam improve comfort | Breathable seat covers and ventilated cushions |
Desk setup and height: finding the best alignment
A proper desk height makes a big difference for comfort and long-term health. Use elbow angle as your guide: aim for 90–110° when typing so shoulders stay relaxed and wrists stay neutral. Standard desks sit near 70–75 cm, yet personal adjustments matter more than any single number when you follow home office ergonomics tips.
When a desk is too low, raise it using sturdy blocks or a riser. If the desk is too high, raise your chair and support your feet with a footrest so knees stay at a comfortable angle. These small moves keep your hips slightly above knees and prevent pressure behind the knees while supporting good home workspace ergonomics.
Standard desk heights and when to adjust
Measure while seated: elbows relaxed, forearms parallel to the floor. If your wrists bend up while typing, lower the keyboard or raise the chair and add a footrest. If your shoulders hunch, the desk may be too high. Adjust until typing and mousing feel effortless.
Solutions for fixed desks: keyboard trays and footrests
Fixed desks need clever fixes. A keyboard tray drops the keyboard to wrist level without changing monitor height. Add a footrest when you raise the chair to maintain proper leg support. These inexpensive items address alignment issues quickly and fit well with beginner guide ergonomics.
Benefits of sit-stand desks and recommended sitting/standing routines
Adjustable desks such as the Uplift V3 let you set precise heights for typing, mousing, reading, and viewing. Alternating between sitting and standing improves circulation and reduces stiffness. Try a 45–60 minute sitting block followed by 15–20 minutes standing, then adjust to what feels best for your body.
Keep frequently used items within reach and place documents near the monitor with a holder to reduce head turning. For more detailed setup steps and measurements, see this ergonomic desk setup guide from UpDownDesk: ergonomic desk setup.
Monitor and screen placement for neck and eye health
Good screen placement keeps your neck neutral and your eyes comfortable. For readers new to workstation setup, this section gives clear steps you can follow right away. These adjustments are a core part of ergonomics for beginners and fit well into any beginner guide ergonomics checklist.
Optimal distance and eye-level position
Place the main monitor directly in front of you, just behind the keyboard, so you don’t twist your neck. Aim for about an arm’s length away; no closer than 20 inches and no farther than 40 inches for most users. Set the top of the screen at or slightly below eye level to reduce upward gaze and neck strain.
If you read longer documents or use the phone often, stand up and shift your view every 20–30 minutes to reduce eye fatigue. For an authoritative reference on these limits, see a practical summary at office ergonomics advice.
Adjustments for bifocals and multi-monitor setups
If you wear bifocals, lower the monitor another 1–2 inches to find a comfortable reading window. That small drop keeps your head level when you look through the lower lens area.
When you use multiple monitors, place the primary screen centered with the keyboard. Angle secondary screens inward so you can keep your neck neutral when switching displays. Keep all screens within the same 20–40 inch reach to avoid leaning forward.
Laptop screen solutions: stands, external monitors, and placement tips
Laptop-only setups often force a low screen height. Use a laptop stand like the Rain Design iLevel2 or a simple riser made from stable items to raise the screen to eye level. Pair an external keyboard and mouse to preserve a neutral wrist and shoulder position.
Monitor arms, such as the Herman Miller Jarvis arm, let you fine-tune height and angle without clutter. If you’re on a budget, stacked books under a monitor work well for short-term adjustments.
| Use case | Recommended distance | Top-of-screen position | Practical gear |
|---|---|---|---|
| Single external monitor | 20–40 inches (50–100 cm) | At or slightly below eye level | Monitor arm, adjustable stand |
| Multi-monitor setup | All screens within arm’s reach | Primary screen centered; others angled inward | Dual monitor mount, cable management |
| Laptop at desk | Raise screen to eye level; use external keyboard | Lower 1–2 inches if wearing bifocals | Laptop stand (Rain Design iLevel2), external keyboard/mouse |
| Budget fixes | 20–40 inches using available risers | At or slightly below eye level using risers | Stacked books, small monitor riser, clamp shelf |
A well-tuned keyboard and mouse setup keeps wrists neutral and shoulders relaxed. Start by placing both devices on the same surface so your hands stay at or slightly below elbow level. Small adjustments cut down on fatigue and support long-term comfort in your home workspace ergonomics.

Follow a few clear rules from ergonomics for beginners to reduce strain. Keep your forearms aligned with your wrists, keep shoulders loose, and bring the mouse close to limit reaching. Changing sensitivity and device placement often solves discomfort faster than buying new gear.
Keyboard height, angle, and layout
Place the keyboard so your wrists remain straight and your shoulders stay relaxed. Avoid using keyboard feet that bend the wrist upward. Split keyboards and tenting let your hands rest at shoulder width, better matching natural arm angle. Tenkeyless boards move the mouse inboard, cutting reach for many users in beginner guide ergonomics.
Mouse choices and alternative input devices
Choose a mouse that fits your hand and supports a light grip. Set pointer sensitivity so you can move with small hand motions. The Logitech M720 is a solid option for comfort and programmable shortcuts. If wrist or shoulder pain persists, try a trackball, stylus, or graphics tablet to shift movement away from the wrist.
Wrist protection and contact stress
Wrist rests cushion the palm and reduce pressure on the carpal tunnel at rest. Pad sharp desk edges to prevent contact stress on the forearm. Avoid constant pressure against a hard edge while typing. Short micro-breaks and gentle wrist stretches help keep tissues flexible during the day.
| Item | Benefit | When to choose |
|---|---|---|
| Kinesis Freestyle Edge (split keyboard) | Supports neutral wrists and shoulder-width positioning | When shoulder or ulnar strain occurs from narrow typing |
| Varmilo VA87M (tenkeyless) | Moves mouse closer; compact layout reduces reach | Small desks or users who rarely use the numeric pad |
| Microsoft Sculpt Ergonomic Keyboard | Curved layout and cushioned palm rest for relaxed hands | Users seeking gentle slope and built-in wrist support |
| Logitech M720 Mouse | Comfortable shape and programmable buttons | Users needing customizable shortcuts and long battery life |
| Trackball / Graphics tablet | Reduces repetitive wrist motion; alternative movement patterns | People with persistent wrist or shoulder pain |
| Wrist rest & desk edge padding | Prevents contact stress and cushions pressure points | All users who rest wrists on hard surfaces |
A tidy layout makes work feel easier and safer. Small changes in where you place tools cut strain and speed up tasks. Use home office ergonomics tips to set a primary zone that keeps everything you need within arm’s reach.
Create a primary work zone for the items you touch most during a session. Place your phone, notepad, and a pen within easy reach on the same side as your mouse. Keep printed documents and the stapler near your dominant hand so you do not twist or overreach.
Under-desk storage can help hide clutter, but avoid filling the space below your knees. Clear legroom lets your chair move freely and reduces awkward angles. If you need storage, choose low-profile drawers or a nearby filing cabinet that does not sit beneath your thighs.
Run quick ergonomic checks at the start of each day. Can you reach your phone or mouse without twisting? Is the monitor centered with your midline? If you answer no, shift items a few inches and test again until movements feel natural.
Adopt simple habits to reinforce the layout. Stand to fetch items that sit outside the primary zone. Remove seldom-used gadgets from the desktop to lower visual clutter and mental fatigue. These small choices form the core of home workspace ergonomics.
For people new to this, follow a beginner guide ergonomics routine: set the primary zone, free your leg space, and perform quick reach checks each hour. Over time, this creates a setup that reduces strain and keeps you focused.
Lighting, glare control, and visual ergonomics
Good lighting makes long workdays easier on the eyes and helps keep focus steady. Use practical home office ergonomics tips to shape light around tasks, screens, and your natural rhythms. Start by planning a layout that brings daylight into the primary work zone while leaving room for adjustable lamps.
Prioritizing natural light and positioning your desk
Place your desk so windows provide side or front lighting rather than direct backlight. Natural light reduces eye strain and supports well-being when combined with a tidy workspace and good airflow. If glare appears at certain times, shift the desk a few inches or use blinds to control brightness.
Task lighting and reducing screen glare to prevent eye strain
Layer ambient and task lighting for even coverage. A focused task lamp like the IKEA Forså can fill gaps when overhead light is weak. Angle lights perpendicular to the monitor to cut reflections and add an anti-glare screen if needed.
For real-time auto-dimming and asymmetrical optics that reduce screen glare, consider monitor-mounted lights that keep the screen visible without bright reflections. Learn more about ergonomic lighting choices at ergonomic lighting workplace guide.
Color temperature and bulb choices for sustained focus
Match color temperature to your task and time of day. Cooler light near 5000 K boosts alertness for focused work. Warmer tones around 2700–3000 K calm the eyes for reading or winding down. Keep general office intensity at 300–500 lx and task areas at 500–750 lx for clear visibility.
| Purpose | Recommended Lux | Color Temperature (K) | Practical Tip |
|---|---|---|---|
| General workspace | 300–500 lx | 3000–4000 K | Use diffused overhead lighting to avoid harsh shadows |
| Detailed tasks (reading, paperwork) | 500–750 lx | 4000–5000 K | Add an adjustable task lamp positioned perpendicular to work |
| Reading / relaxed work | 450–550 lx | 2700–3000 K | Choose warm bulbs and softer lamp shades |
| Glare control | N/A | N/A | Use indirect lighting, anti-glare screens, and blinds |
| Energy & sustainability | N/A | N/A | LED monitor lamps save power versus full-room LEDs |
Movement habits and micro-break strategies for long-term health
Good posture and a smart setup matter. Still, movement habits make the biggest difference over weeks and years. This short guide gives clear routines you can use at home to protect your spine, reduce fatigue, and boost focus. It fits into any schedule and pairs well with beginner guide ergonomics and broader home workspace ergonomics fixes.
Why sitting still is harmful despite a great setup
Sitting in the same position for hours compresses spinal discs and slows circulation. Even the best chair cannot remove this risk. Regular changes in posture help distribute load across tissues and prevent stiffness.
Practical routines: micro-breaks, stretching, and the 20–8–2 principle
Try the 20–8–2 pattern promoted by ergonomic experts: sit for 20 minutes, stand or stretch for 8 minutes, then move lightly for 2 minutes. Repeat every 30 minutes to protect discs and improve blood flow. Use a timer or app to stay consistent.
Simple desk exercises and posture checks you can do hourly
- Shoulder rolls: 8 slow circles each direction to release tension.
- Neck tilts: 5 reps each side, hold 5 seconds to ease neck strain.
- Seated spinal twist: 3 deep breaths each side to mobilize the thoracic spine.
- Finger and wrist stretches: extend and flex fingers to reduce stiffness.
- Stand and walk: two minutes of light walking or stepping to restore circulation.
Combine these moves with home office ergonomics tips like alternating sitting and standing, using an adjustable desk, and choosing a chair with adaptive back support. Small, repeated actions make the difference. Use this approach alongside beginner guide ergonomics advice to build durable, healthy habits in your home workspace ergonomics plan.
Ergonomic tools and accessories worth considering
Choosing a few targeted accessories can fix persistent alignment problems and make home workspace ergonomics practical and durable. Start with items that solve your biggest discomforts, then add upgrades as needs change.
Footrests, monitor arms, and laptop stands: when to add them
Use a footrest when your chair is raised and your feet no longer sit flat. A stable footrest supports circulation and reduces pressure under the thighs.
Monitor arms let you place screens at eye level without buying a new desk. They are useful in multi-user spaces and when you need quick height or tilt changes.
Laptop stands raise the screen to the correct eye-line. Pair a stand with an external keyboard and mouse to avoid neck strain.
Ergonomic keyboards, mice, and alternative input devices
Split and contoured keyboards from brands like Kinesis help keep wrists neutral and lower forearm pronation. Tenkeyless layouts shrink reach and free desk space.
Logitech and Microsoft offer mice with varied shapes and sensitivity settings. Choose one that matches your hand size and grip to cut shoulder and wrist load.
Consider trackballs or vertical mice if standard designs worsen pain. Wrist rests and edge padding reduce contact stress on hard desks.
Affordable upgrades vs. premium investments and certification notes
Budget upgrades include lumbar pillows, seat cushions, monitor risers, and simple keyboard trays. These deliver quick gains for people exploring ergonomics for beginners.
Premium purchases—BIFMA- and EN-certified chairs, adjustable desks from Herman Miller, Steelcase, or Uplift—cost more and often last longer.
Look for EN 1335 or BIFMA certification when buying chairs and desks. Certified products offer tested adjustability and durability that justify investment for heavy daily use.
Use home office ergonomics tips to decide what to buy first: fix seating, then screen height, then input devices. Small, well-chosen tools add up to a more comfortable, productive home office.
Special considerations: laptop users and small-space workstations
Working from a laptop in a small room creates unique challenges. Low screen height and cramped keyboards push wrists and necks into awkward positions. This short guide offers practical fixes that fit tight budgets and shared spaces while keeping ergonomics for beginners simple and effective.
Why laptop-only setups cause problems and how to fix them
Laptop screens sit too low for comfortable neck posture. Built-in keyboards force shoulders to hunch. These habits lead to pain over weeks and reduced focus. A basic external keyboard and mouse paired with a laptop stand raise the screen to eye level and recreate desktop ergonomics.
Choose a compact tenkeyless keyboard for smaller desks. A wireless mouse and a simple stand such as the Rain Design iLevel2 provide immediate improvement. Use short work blocks when you must work directly on the laptop to reduce strain.
Compact solutions for tight spaces and multi-use rooms
Small spaces benefit from foldable tools and vertical storage. Foldable laptop stands and compact external keyboards free desk area when you store them. Monitor risers with a small footprint lift screens and create storage underneath for documents or a slim docking station.
Adopt clutter-minimizing habits. Keep only daily essentials within reach and store other items in vertical shelves. This preserves legroom and makes it easier to maintain a neutral posture during work bursts.
Portable accessories that improve ergonomics on the go
Portable accessories let you keep good posture whether you work at a café, hotel, or a satellite office. Tested travel tools include a lightweight laptop stand, a compact tenkeyless keyboard like the Varmilo VA87M, a clamp-style portable monitor arm, and a travel-sized lumbar roll.
Pack a small kit with a foldable stand, compact keyboard, and a mouse. These items are a modest investment that deliver big returns for comfort and productivity. Use these items together for consistent setup across locations and follow beginner guide ergonomics to make them part of your routine.
For anyone new to desk setup, these home office ergonomics tips help you start small and scale improvements. Pick one upgrade, try it for a week, and note the change in comfort before adding the next.
Customizing ergonomics for body size, existing pain, and disabilities
Ergonomics for beginners starts with honest assessment of your body, pain points, and daily tasks. Small adjustments to chair height, seat depth, and monitor placement make a big difference for comfort and function. Use this short guide to shape home workspace ergonomics to your size and needs.
Adjusting chair and desk for shorter or taller users
Shorter users should raise the chair so hips sit slightly above knees. If feet do not reach the floor, add a footrest. Seat depth must allow 1–2 inches of space behind the knee while the backrest supports the lumbar curve.
Taller users need deeper seat depth and higher monitor placement. Choose desks and chairs with wide adjustment ranges. Sit-stand desks that move between about 28” and 43” help match varied heights for both sitting and standing work.
When to consult a clinician or ergonomic specialist
Persistent pain that does not ease after basic fixes calls for professional help. Physical therapists, occupational therapists, and certified ergonomists can assess posture, suggest targeted changes, and recommend therapies.
If a condition limits standard adjustments, seek a clinician before investing in specialized equipment. Certified products and specialist guidance reduce trial-and-error and speed recovery.
Adaptive tools and assistive devices to accommodate limitations
Alternative input devices such as trackballs, vertical mice, tablets, and styluses reduce repetitive strain. Specialty arm supports and assistive seating help stabilize posture for people with neuromuscular limits.
Grips, handle size, and tool geometry change required force. Reducing grip force through better design lowers risk of cumulative trauma disorders. When choosing gear, prefer items tested to standards like BIFMA or EN.
| Need or Body Trait | Quick Adjustment | Adaptive Devices |
|---|---|---|
| Short legs / feet off floor | Lower seat depth, add footrest | Adjustable footrest, height-adjustable desk |
| Tall torso / long thighs | Increase seat depth and monitor height | Deep-seat chair, tall sit-stand desk |
| Neck or eye issues | Raise or lower monitor; lower 1–2 inches for bifocals | Monitor arm, external screen, document holder |
| Wrist or hand pain | Adjust keyboard angle and height | Split keyboard, vertical mouse, padded rests |
| Limited trunk control or mobility device user | Provide lumbar support and clear under-desk space | Assistive seating, custom arm supports, wide-adjustment furniture |
- Prioritize neutral lumbar support and seat depth that matches your buttock-to-knee length.
- Keep most work in Zones 0 and 1 to limit awkward reach and reduce strain.
- Choose highly adjustable chairs and desks when possible to future-proof your setup.
Use this material as part of a beginner guide ergonomics plan for your home. Tailoring home workspace ergonomics to body size and specific limits makes daily work safer and more productive for people at all ability levels.
Common ergonomic mistakes and how to fix them quickly
Small setup errors cause big discomfort over time. Use these quick corrections from this beginner guide ergonomics to stop strain before it starts. Read each brief tip, try it, and tweak until movement feels easy.
Poor posture habits to watch for and immediate corrections
Leaning forward toward the screen creates neck and upper back pain. Sit fully back so the chair supports your lower spine. Lift the monitor so the top of the screen is at or slightly below eye level.
Slouching or tucking the pelvis shortens breathing and strains muscles. Add a lumbar pillow or small rolled towel to keep a neutral curve. If feet dangle, lower the chair or add a footrest so feet rest flat.
Top quick fixes: monitor height, chair positioning, and keyboard placement
Center the monitor directly in front of you to avoid twisting the neck. Use a laptop stand or a stack of books to raise the screen if needed. External monitors from Dell and LG make this easy in many home setups.
Adjust chair height so knees are close to a 90° angle and feet touch the floor. Add a seat cushion for comfort or a lumbar pillow for extra support. Switch to a tenkeyless keyboard or install a keyboard tray to keep the mouse near the hand.
How to test your setup with simple at-desk checks
Sit back against the backrest and breathe for a minute. Check that eyes align with the top of the screen and shoulders feel relaxed. Type for 10–30 minutes and note any wrist, shoulder, or neck discomfort.
If pain appears, change one thing at a time: move the monitor 1–2 inches, lower or raise the chair by 1–2 cm, or bring the keyboard 3–5 inches closer. Repeat the test until wrists and shoulders feel neutral.
Use these home office ergonomics tips as a quick toolkit when pain shows up. Keep clutter out from under the desk to preserve legroom and prevent awkward reaches. Small adjustments now protect you later and improve focus.
Conclusion
This beginner guide ergonomics summary shows that correct chair support, monitor and keyboard placement, legroom, and regular movement matter most. Simple changes — raising a monitor, adding lumbar support, or using a stand-up routine — reduce risk of neck and back pain and make long workdays easier.
Ergonomics for beginners is about prioritizing fixes that relieve your biggest pain points first. Try low-cost options like a laptop stand or footrest, then consider certified furniture from brands that meet EN 1335 or BIFMA standards when you upgrade.
Combine adjustable core furniture, ergonomic peripherals, and micro-break habits for the best results. Use these home office ergonomics tips to test and refine your setup: small, steady improvements add up to lasting comfort and higher productivity.
FAQ
What exactly is ergonomics for a home office?
Ergonomics in a home office means arranging your desk, chair, monitor, keyboard, and accessories so your body stays in a neutral, supported position. The goal is to reduce strain on the spine, neck, shoulders, wrists, and joints by optimizing posture, support, reach, and movement throughout the day.
Why does home office ergonomics matter for my comfort and productivity?
Good ergonomics reduces the risk of neck and back pain, sore wrists, and shoulder problems while improving focus and energy. Small adjustments—correct chair support, screen height, and balanced reach—cut fatigue and help you sustain concentration over hours and weeks.
What are the health risks of poor home workspace ergonomics?
Poor setup can cause chronic neck and back pain, wrist tendonitis, shoulder strain, and contact stress from hard desk edges. Prolonged static sitting increases disc pressure and circulation problems. Over time, repeated micro-stressors can develop into chronic pain.
What core principles should beginners follow?
Focus on neutral posture (spine aligned, shoulders relaxed), support (lumbar and seat depth), reach (keep frequently used items close), and movement (regular micro-breaks and sit-stand alternation). Prioritize alignment—elbow angles around 90–110°—over fixed height numbers.
How do I choose the right chair for support and adjustability?
Look for adjustable lumbar support, seat height and depth, a reclining back, and 3D/4D armrests when possible. Certified chairs meeting BIFMA or EN 1335 standards provide dependable ranges. If a new chair isn’t feasible, add a lumbar pillow and seat cushion to encourage sitting back into the chair.
What if my desk height is fixed—what can I do?
Use a keyboard tray to lower typing height, raise the chair and add a footrest so feet are supported, or place blocks under desk legs to raise the surface. For many people, desk alignment that produces a 90–110° elbow angle is more important than an absolute desk height.
How should I position my monitor to protect my neck and eyes?
Place the monitor directly in front of you about an arm’s length away (roughly 20–40 inches). The top of the screen should be at or slightly below eye level. Lower the screen 1–2 inches if you wear bifocals. Use monitor arms, stands, or even stacked books to get the height right.
What are the best solutions for laptop ergonomics?
Avoid laptop-only use. Raise the screen with a stand (Rain Design iLevel2 or similar) and use an external keyboard and mouse. If space is tight, choose compact external keyboards and portable stands to replicate desktop ergonomics.
How should my keyboard and mouse be arranged?
Position the keyboard so your wrists stay neutral and hands are at or slightly below elbow level. Keep the mouse on the same surface and close to the keyboard to avoid reaching. Consider split or tenkeyless keyboards to bring the mouse closer and reduce shoulder strain.
Which mouse or input device should I choose?
Choose a mouse that fits your hand (contoured or vertical), with adjustable sensitivity so you can use light touches. Alternatives like trackballs, styluses, or graphics tablets can reduce wrist or shoulder load for some users. Logitech M720 is a commonly recommended option.
How can I reduce wrist and forearm contact stress?
Use wrist rests, pad hard desk edges, and avoid keyboards with steep tilt that extend the wrist. Keep forearms supported and wrists in line with the forearm while typing and mousing to minimize compression and contact stress.
How do I organize my workspace to minimize reaching and twisting?
Create a primary work zone with your phone, frequently used documents, and tools within easy reach. Keep the monitor centered, clear under-desk legroom, and store seldom-used items away from the primary zone to prevent awkward twisting or stretching.
What lighting should I use to prevent eye strain?
Prioritize natural light and position your desk to avoid glare on the screen. Add adjustable task lighting (IKEA Forså is a practical example) and use cooler color temperatures (around 5000K) for alert work or warmer tones (2700–3000K) for relaxed tasks. Anti-glare screens or blinds can help reduce reflections.
How often should I move or change position during the workday?
Don’t sit still for hours. Use a sit-stand routine and micro-breaks. The 20–8–2 rule (every 30 minutes: sit 20 minutes, stand or stretch 8 minutes, move lightly 2 minutes) is a practical guideline to reduce disc loading and improve circulation.
What simple stretches or desk exercises can I do hourly?
Try shoulder rolls, neck tilts, seated spinal twists, wrist stretches, and brief walks around the room. Even 1–2 minutes of movement every half hour eases muscle tension and refreshes circulation.
Which ergonomic accessories are worth buying first?
Prioritize a supportive chair or a lumbar pillow/seat cushion if a new chair isn’t possible. Next, address screen height with a laptop stand or monitor arm and add an external keyboard and mouse. Affordable upgrades like footrests, keyboard trays, and wrist rests often provide big comfort gains for low cost. (BIFMA/EN certifications help identify durable, adjustable products.)
How do I customize ergonomics for my height or existing pain?
Adjust seat depth and lumbar support to match your spine curve, set chair height so feet are flat or use a footrest, and tune monitor and keyboard heights to keep elbows at 90–110°. If pain persists, consult a clinician or ergonomic specialist for tailored adjustments and adaptive tools like alternative input devices or specialty seating.
What are common ergonomic mistakes and quick fixes?
Common errors include an off-center monitor, incorrect chair height, and storing items under the desk. Quick fixes: center the monitor, raise or lower your chair and add a footrest, use a laptop stand plus external keyboard, add a lumbar pillow, and pad sharp desk edges to prevent contact stress.
How can I test whether an adjustment is working?
Sit back with your spine supported, check that your eyes align with the top of the screen, and type or work for 10–30 minutes. Note any discomfort in shoulders, neck, or wrists. If you feel strain, make small adjustments and retest after another short session until shoulders and wrists feel relaxed.
Are sit-stand desks worth it and how should I use them?
Sit-stand desks are beneficial for reducing prolonged sitting and encouraging movement. Alternate postures hourly and follow practical routines—stand for some tasks, sit for focused work, and use micro-breaks. Uplift V3 and similar desks offer wide adjustment ranges for better alignment across activities.
What low-cost ergonomic improvements give the biggest benefit?
Add a lumbar pillow, seat cushion, laptop stand, external keyboard/mouse, monitor riser (even stacked books), wrist rest, and footrest. These budget fixes often produce measurable reductions in discomfort within weeks without major investment.
When should I seek professional ergonomic help?
If you have persistent pain, numbness, or functional limitations that don’t improve with adjustments, consult a clinician or certified ergonomic specialist. They can recommend adaptive tools, alternative input devices, or workplace modifications tailored to your needs.